The National Bonsai Foundation’s latest bulletin is out and features my article further outlining my impressions of the bonsai industry in Japan and what lessons I think we can incoroprate here in the U.S. You can find it here.


The National Bonsai Foundation’s latest bulletin is out and features my article further outlining my impressions of the bonsai industry in Japan and what lessons I think we can incoroprate here in the U.S. You can find it here.
In this post I wanted to share my experience with taking bonsai to the Green Club in Tokyo, how things are setup there, and a few first impressions .There are many blog posts explaining what the Green Club is so I will not go in depth here. Don’t worry, there will be plenty of bonsai pictures too.
Several days after the Kinbon photoshoot at Daijuen, activities shifted to preparing trees to take to the Green Club,which among other things serves as the bonsai sales area during Kokufu-ten.

Getting ready to moss this Quince for the sales area. Sorry no after shot.

In addition to bonsai, we were bringing a variety of soils and fertilizers.

Takuya begins loading the van.
The afternoon before we left was spent getting everything thing organized and loaded in the van. I was amazed at how efficiently the van was loaded.Each square inch of space was maximized to ensure everything fit and it would make the 3 hour trip undamaged.

Finished, except for a large Red pine that would fill the remaining space.
The van also had a custom self installed, doubling the number of trees we could take. We finished just after sunset and hit the sack in preparation for an early start the next day.

Aichien crew in the black van, leading the way through one of the many tunnels we encountered on the Tomei Expressway.
Before leaving Daijuen we were joined by Mr. Suzuki’s son-in-law, Mr. Tanaka of Aichien and two of his apprentices, Juan Andrade and John Milton. They too had a van loaded with bonsai and together we would roll convoy to Tokyo.

My first view of Mt. Fuji, I would drive past the mountain another 5 times through out my trip but would not see it again until I was on the plane headed back home.
The Green Club was a buzz with activity upon our arrival. Vans jockeying for position to unload, display tables being set up, and apprentices trying to anticipate what needed to be done.
 Setting up the sales tables proved to be a group effort. The apprentices began unloading the trees as the sempai’s discussed how to arrange the trees.
 This resulted in us having to re-position trees several times before the most senior man, Mr. Suzuki (on the right) was satisfied.
Once the tables were setup we had some “free time” to look around but did not stray to far in case something needed to be lifted.
Here are a few observations from my time spent at the Club.
We often don’t think of bonsai as a business. For most of the world bonsai is a hobby, something we do for fun. As someone who makes his living caring for bonsai I had some idea of the professional bonsai world, but coming to Japan made me very aware of the business of bonsai.
For the top bonsai professionals in Japan the Green Club during Kokufu is very important to their livelihood. Selling trees and attracting clients is how these men feed their families. First and foremost its about sales. The Kokufu-ten draws people from all over world, many of whom are coming to shop for bonsai at the Green Club. This influences which trees are brought to sale.

$40,000 fishing lure.
You can think of each professional as a fisherman using his best lure to catch the biggest fish. Currently the biggest fish come from China, the recent growth of the Chinese economy has brought an appetite for high-end trees and pots. Therefore the lures used appeal to these fish the most, and the most appealing lures are big. As I walked around on the first floor I noticed that each pro had at least one massive tree for sale.

Ginormous Quince brought by a different professional also named Suzuki.
Another major component is the Green Club provides an opportunity for each nursery to show off their stuff. I heard on several occasions that the trees in the Green Club would be better that those in the exhibit. In many instances this was true.Sale trees consisted of historic bonsai, previous Kokufu winners, famous trees recently restyled, and bonsai previously unknown in the community. The point is to let everyone else know that you still have the skills to pay the bills. After all, the green in Green Club doesn’t just refer to the color of the trees.


 The quantity and quality of the trees at the Green Club was unlike like anything thing I have ever seen in one location. As you can see there were not only big expensive trees but material at every stage of development. The more I walked around the more I was struck by the size of the bonsai industry in Japan and the number of businesses it supported. This left me with a question that I will try to answer in an upcoming post, What is fueling Japan’s bonsai industry and what can we learn from it?
Thanks for reading.
I are pleased to announce that our former summer intern and volunteer Chris Baker, has been selected as the next Curator of the bonsai collection at the Chicago Botanic Garden. Chris is assuming the position after the retirement of longtime curator, Ivan Waters.
In addition to his time working at the National Collection, Chris spent 1 year apprenticing with Mr. Tohru Suzuki at Daijuen in Okazaki, Japan.
Chris has been a huge asset to us, both he and his contributions to the Museum will be missed. Chris assumes the position April 21st and will be returning to DC in May to take part in our annual PBA Bonsai Festival in his new role.
The nicest weather I experienced during the trip was on my third day in Japan, the rest of the trip was either cold and windy, cold and rainy, or cold and snowy. This day however was sunny and pleasant, which was great since the bonsai magazine Kinbon, was coming to do a photo shoot of the trees that were headed for Kokufu-ten.
These trees had already been photographed once before when they were judged a few weeks prior to my arrival. It was interesting to find out that all the bonsai in the Kokufu exhibit are judged and photographed almost a month before the actual show.
Since then they were being kept in the workshop, protected from the elements. This meant that my sempai Takuya and myself would be lifting trees for most of the day.
This needle juniper had some of the tightest foliage pads I’ve ever seen. This tree was from Gashoen, another bonsai nursery nearby, and Mr. Suzuki was taking it to the show for them.

Not the best picture of a very nice japanese black pine. For whatever reason the photos I take with my iphone don’t capture the whole image as it appears on the view finder.

Even from the back this semi cascade white pine looks awesome.

More trees were also being kept in the reception area which is where the photographer set up his backdrop. Since this beech was the closest tree it was the first one to be photographed.

Once things were set up the photo shoot did not take as long as I thought. The displays had been thought out by Mr. Suzuki long in advacnce and it was simply a matter of us removing the tree, Mr. Suzuki changing the stand and then we were there with the next bonsai to photographed. Very effecient.

The next one up was one of my favorite trees. A bunjin white pine which had beautifully old shari.


Since this years Kokufu was a double show, meaning there were two sets of bonsai exhibited, each set was judged and awarded. This already famous Kichou, (Important Bonsai Masterpiece), root-over-rock JBP won “Best Conifer” of the second group.


In addition to the big trees there were several three-point-displays photographed.

Japanese White Pine with kumquat shohin and small fern. The kumquat was kept warm in a small plastic greenhouse inside the Suzuki home along with a few houseplants.

Another killer japanese white pine smiles for the camera.
The same semicascade white pine from above, but now paired with a shohin root-over-rock japanese maple, and perhaps the most famous accent plant ever.

I really liked the character of this tree, great trunk. It is a procumbens juniper or sonare in Japanese, with foliage as tight as your ever going to see.

Once photographed each tree was set out to catch some much needed rays. After we set this tree down I noticed something white around the nebari. It looked like the tree had some fungal issue.

Concerned, I asked Takuya about it, he smiled and said “Strong tree”. I am no stranger to mycorrhiza but I’ve never see it as abundant as this, it was growing up the nebari! Not only is this a strong tree but its another kichou bonsai.

This quince was one of the shohin used in another three-point-display. Not only is this tree top shelf, but check out the patina on its pot. Kokufu trees are transplanted into antique Chinese and Japanese pots for the exhibit then put back into their “growing” containers after the show.

The very last thing I did was give each tree a much needed watering. If you have the chance pick up a copy of Kinbon to see the actual photos. As always, thanks for reading.
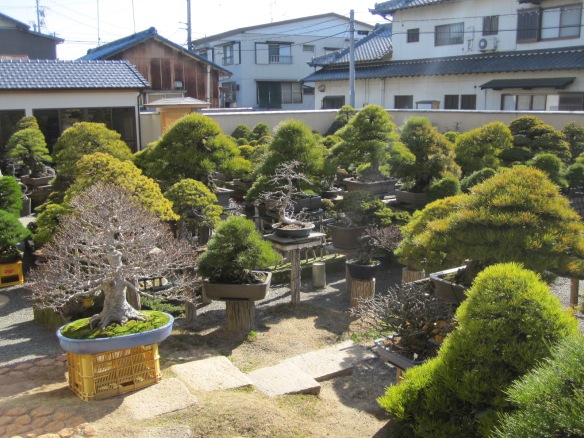
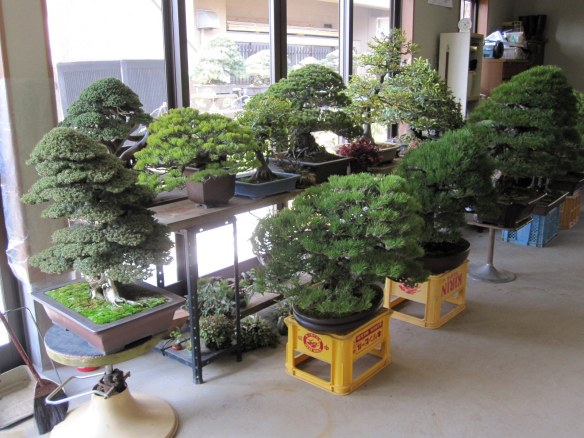
For any serious bonsai enthusiast on the Eastern Seaboard, there was one place to have been on March 14th. Gateway Garden Center in Hokenssin, DE was host to over 400 bonsai being sold from the legendary Kennett Collection.
Almost all the trees had been imported from Japan and were being sold at amazing prices. I actually passed on buying things last month in Japan in anticipation of this sale.
Museum Curator Jack Sustic, myself, and Museum volunteer Ted Pickett drove up that morning and arrived an hour early. People had already began to muster, circling the perimeter trying to locate the trees they wanted.
There were buyers from Massachusetts, Ohio, Pennsylvania, Delaware, New York, New Jersey, Maryland, Virginia, North Carolina, Georgia, and even Houston, Texas. Let me know if I missed any.


 A tent had been set up with cashiers, heaters and best of all free coffee and donuts.
 The rules were simple and as fair as possible so that everyone got a chance to get a tree.
 Each person pulled a wrist band out of a box and that determined when you could go in.

Peter Warren MC’d the event, going over everything in detail and bound everyone to a gentlemen’s agreement to abide by the rules.

 In what we can hope will become as iconic an image as the original, Peter pumped up the crowd with the shout of “Bonsai Power!”.

Jack at the starting gate waiting for his group to go. No one dared to try anything funny with what I assume were the first bouncers ever at a bonsai sale.
I was in shortly after Jack and was able to photograph the trees. Enjoy.


The first group went in at 10 am and apparently this maple was the first tree purchased, by 11:30 over half the bonsai were sold.


It was a great experience, even for those who didn’t get exactly what they wanted. Thank you to Mr. Paul and everyone involved in orchestrating this event. It’s exciting to know that so many fine bonsai have been distributed around the U.S. and I assume we will be seeing many of them in upcoming exhibitions.
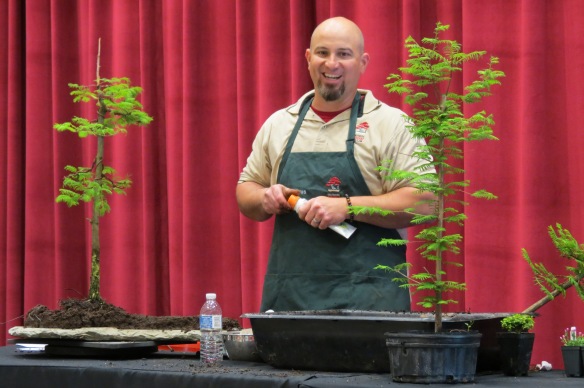
Here is your chance to work with us at the Museum. We are in the final week of accepting applicants for our Spring/Summer intern. If you are interested please send your resume by this Friday, March, 14th 2014.

Last years Bonsai Intern Chris Baker.
Description
This internship will be at the National Bonsai & Penjing Museum at the U.S. National Arboretum. The intern will be trained by the curator in the care and maintenance of the bonsai collection. This internship is a paid position that receives a stipend. Weekend work will be required. The intern may work a full time or part time schedule depending on availability. Internship will not exceed 480 hours.
Qualifications
Applicants should have an active interest in the art of bonsai. The incumbent should have a basic understanding of plant care and have the ability to accurately follow instructions relating to planting, pruning, weeding and other routine garden maintenance tasks. Applicant must be a U.S. Citizen.
Duties & Working Conditions
Duties include assisting with the day to day care of the bonsai collection. The intern will work under the direction of the museum curator. The intern will assist in a wide variety of tasks required in the maintenance of the bonsai collection as needed such as watering, repotting, trimming and wiring.
Interns may have contact with visitors. In many cases work will be outdoors and may involve heavy lifting and exposure to extreme heat and humidity. Duties may also include work in the museum’s gardens.
To apply:
Please send a cover letter and resume via email to USNA.Internships@ars.usda.gov.
Deadline for applications is March 14, 2014.
Questions? Contact the internship office at (202) 245-4563 or USNA.Internships@ars.usda.gov
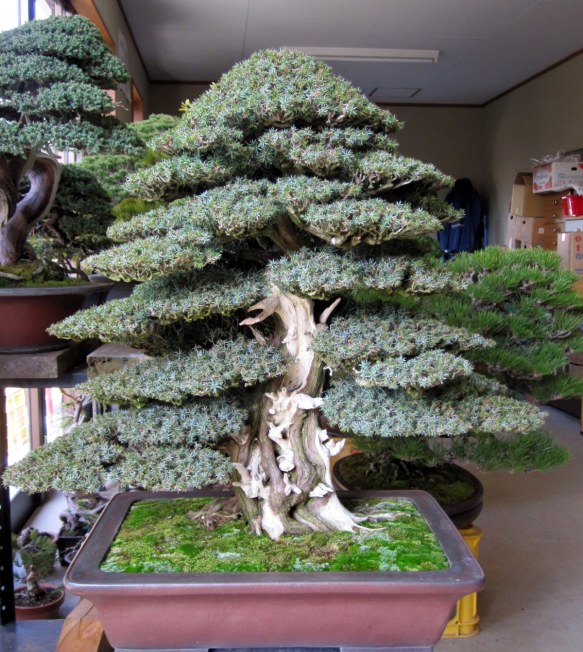
At the end of January I was extremely blessed to have traveled to Japan for a 3 week “apprentice” style learning experience with Mr. Tohru Suzuki at the historic Daiju-en bonsai nursery in Okazaki. This trip was timed to coincide with the 88th Kokufu-ten exhibition where I would have the opportunity to assist Mr. Suzuki and the Daiju-en family with getting their trees to and from Tokyo. Before I share that experience I wanted to highlight the trees of Daiju-en.
When you think of pine bonsai you think of Daijuen. As a 3rd generation bonsai nursery, Daijuen and its founder Saichi Suzuki are credited with developing the now universal technique of de-candling used for Japanese Black Pine bonsai as well as the fast growing Japanese White Pine cultivar ‘Zuisho’.


I had the opportunity to ask Mr. Suzuki about the story surrounding his grandfather’s discovery which resulted in what is now the fundamental technique for training Japanese Black Pine.
For those who have never head the story, it goes like this: One day while in the nursery, Saichi noticed something out of the ordinary with several of his pines. Upon closer inspection the new spring growth had been completely eaten by caterpillars, leaving the trees with out any new shoots.
He set them aside to see what would happen, would they live of die? Not only did the trees live but they put out another flush of growth, only the new needles were much shorter. From that point on the practice of removing spring shoots to force a second flush of growth is applied wherever JBP are growth as bonsai.
I asked Mr. Suzuki about those first trees his grandfather set aside. He said that they were in the formal upright style and at that time they belonged to a customer. I asked if they were still around and he replied that they are still alive but were at another customers home. It would have been awesome to have seen the legendary “catepillar “trees, but there were plenty of historic bonsai at the nursery.
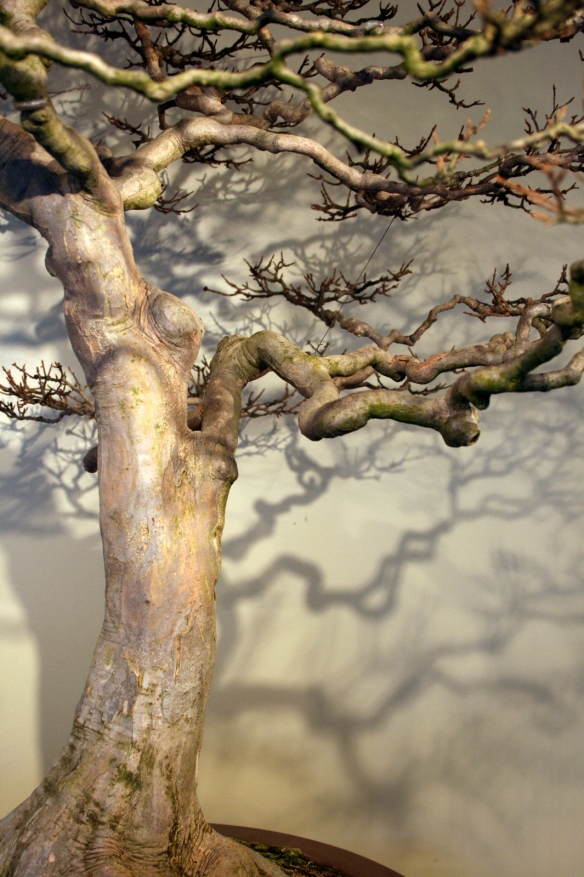
Hear are just a few of the pines at Daiju-en.


 As always thanks for reading, I hoped you enjoyed seeing some of the Daiju-en pines and learning a little bonsai history. More to come from Japan.
The winter edition of the PBA Newsletter is out and features Museum volunteer turned bonsai apprentice Danny Coffey. Danny breaks down his approach in restyling a really cool shimpaku. Get the complete article here.

You can also follow Danny’s journey as an apprentice on his blog “Tree the People“.
The National Bonsai and Penjing Museum, located on the East Coast of the United States, has been having its annual Winter Silhouettes exhibition for nearly 20 years. We’ve recently gone to a biannual show to generate more interest as winter is our slow season at the Arboretum.
 Japanese Maple-Kiyo-hime, In training since 1946, Donated by Akiko Matsudaira.
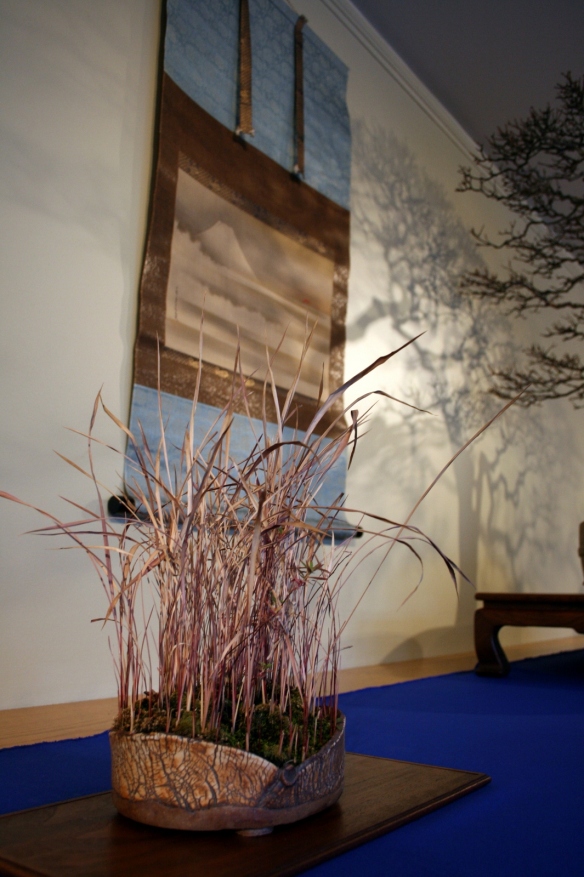
 3 point display with Trident Maple, In training since 1895, Donated Prince Takamatsu, Mt. Fuji scroll, and Japanese Blood Grass.
 Branch silhouette.
 Japanese Blood Grass, container by MC2.
 Triptych of Root-over-rock Chinese Elms, Donated by Yee Sun-Wu.
 Chinese Hackberry, In training since 1946, Donated by Shu-ying Lu.
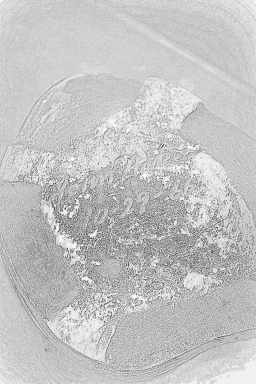
 Winter Suiseki.
 Chinese Elm, In training since 1946, Donated by Yee-sun Wu.
 Bald Cypress, In training since 1972, Donated by Vaughn Banting.
 Chinese Elm, In training since 1970, Donated by Marybel Balendonck.
 Branch detail.
 Year of the Horse shohin display.
 Rabbit foot fern, container by Lang, with horse figurine.
 Chinese Elm, Age unknown, Donated by All Japan Shohin Bonsai Association.
 Trident Maple, In training since 1918, Donated by Prime Minister Obuchi.
 Hut Stone.
 Trident Maple, In training since 1986, Donated by Doris Froning.
 Smooth-leaved Elm, In training since 1982, Donated by Keith Scott.
 Pomegranate, In training since 1963, Donated by Alice Naka.
 Japanese Cedar, In training since 1905, Donated by Eisaku Sato.
 Chinese Elm, Age Unknown, Donated by Stanley Chin.
 Trident Maple, In training since 1916, Donated Takeo Fukuda.

Chinese Elm, In training since 1961, Donated by Shu-ying Lui.
Happy New Year! For the first post of 2014 I wanted to showcase the current display in our tokonoma.
For this display I wanted to try and use some objects that are not my immediate choices for a winter themed arrangement. This would not only show off more of the Museum’s collection but also challenge me to be more creative with them.
From the start I knew I wanted to use a scroll we have of a white hawk on a pine branch.

The scroll makes me think of a remote snowy mountain where this white hawk remains vigilant through the falling snow.
The second object I wanted to use is one of my favorite stones at the Museum because of its name. 30,000 Foot White Beard is the name of this figure stone donated by John Naka. The stone’s name comes from a white strip of minerals running down this otherwise black figure stone which John envisioned as a very long flowing beard.
The white “beard” reinforces the feeling of winter as its shape also reminds me of an hanging icicle or perhaps a frozen waterfall on a distant peak.

John collected the stone from the Kern River in Northern California and I assume the daiza was made by himself and that he collected it in 1966 as both his name, the year 1966, and the date 10-29-66 appear on the bottom of the daiza.

The biggest challenge I encountered was finding a stand that would work within the display. Like picking a bonsai pot you never have enough options and none are ever perfect. I wanted the stone to be elevated enough to be properly viewed and to further enhance its verticality. I also needed the stand to be limited in it’s width so that stone was not visually lost when placed on it.
The first few stands were more traditional in style but weren’t the right size. I then pulled out a stand that seldom gets used here as it has a very narrow range of objects it would work with. However, once I put the stone on it I knew this was the one. Its size was the closest to what I wanted but more importantly it turned a static display into a story I could imagine.

Now, the display became more than just a stone on a stand but a white bearded man walking over a bridge among snow covered trees being watched by a white hawk.

Takahashi Shotei, “Bridge in the Snow” ca. 1910
The addition of a winter grass in a cream colored pot completed the setting as I could hear the cold wind rustling their dried stalks.

Haiku by Matuso Basho
First snow
Falling
On the half-finished bridge

Hope you enjoyed the display. Thanks for reading and for accompanying me for walk in the snow.

Hamano, “Evening Snow at Edo River”1932
I am also very excited to say that I will be making my first trip to Japan next week. I will be studying at the historic Daiju-en nursery for 3 weeks in conjunction with the upcoming Kokufu-ten exhibition. I look forward to sharing my experience here and will be also be posting pictures to my Instagram feed @capitalbonsai

You must be logged in to post a comment.